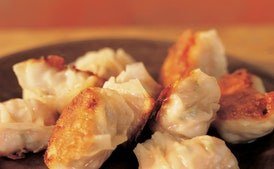
Pot stickers are a savory dumpling filled with a blend of ground pork, bok choy, and aromatic seasonings, then pan-fried to a crispy golden brown.
45 minPrep Time
N/AServings
Nutritional Information
-Calories
-Protein
-Carbs
-Fat
-Sugar
Na-Sodium
Ingredients
- 4 cups water
- 1 tablespoon salt plus 1 teaspoon
- 1/2 teaspoon baking soda (optional)
- 3/4 cup sliced bok choy stalks (1/4-inch-wide pieces)
- 1 1/2 cups firmly packed sliced bok choy leaves (1/4-inch-wide pieces)
- 14 ounces ground pork
- 1/3 cup finely sliced scallions
- 2 teaspoons peeled and grated ginger
- 2 teaspoons white rice wine
- 1 medium egg, lightly beaten
- 1 1/2 teaspoons light soy sauce
- 2 teaspoons sesame oil
- 2 teaspoons sugar
- Pinch of white pepper
- 2 tablespoons cornstarch
- 2 cups Pillsbury Best All-Purpose Flour
- 3/4 cup plus 2 tablespoons water
- 6 tablespoons peanut oil
- 1 cup water
Instructions
- 1To make the filling, first water blanch the bok choy.
- 2In a pot, bring the water to a boil over high heat.
- 3Add the 1 tablespoon salt and the baking soda (if using).
- 4When the water returns to a boil, add the bok choy stalks and allow the water to return to a boil.
- 5Add the bok choy leaves and blanch for 1 minute, or until the leaves turn bright green.
- 6Immediately turn off the heat.
- 7Run cold water into the pot, then drain off the water.
- 8Repeat.
- 9In a large bowl, place the bok choy, the 1 teaspoon salt, and all of the remaining filling ingredients.
- 10Using a wooden spoon or 2 pairs of wooden chopsticks, mix the ingredients together, stirring them in one direction.
- 11Stirring in this way ensures the mixture will become a cohesive filling.
- 12Cover and refrigerate for at least 6 hours or up to overnight.
- 13The longer it rests, the easier it will be to work with.
- 14To make the dough: In a large bowl, place the flour and make a well in the center.
- 15Gradually add the water to the well, and use your fingers to combine it with the flour until it is absorbed and a firm dough forms.
- 16If the dough is too dry, add a little more water.
- 17Knead the dough in the bowl for about 15 minutes, or until smooth and elastic.
- 18Cover the dough with a damp cloth and allow to rest for 1 1/2 hours.
- 19Dust a work surface with flour.
- 20Divide the dough into 3 equal pieces.
- 21Work with 1 piece at a time, and keep the others covered with the damp cloth.
- 22Using your palms, roll into a log 12 inches long.
- 23Cut crosswise into 12 equal pieces.
- 24Using a small rolling pin, roll out each piece into a 3-inch round.
- 25Keep the work surface well dusted with flour as you work.
- 26Place 1 round on the palm of one hand, place 1 tablespoon of the filling on the center, and fold the round into a half-moon.
- 27Using the thumb and forefinger of the other hand pleat the seam closed, making from 5 to 7 pleats.
- 28Repeat to form more dumplings until all of the rounds are used.
- 29Cover the dumplings with plastic wrap to prevent them from drying out, then repeat with the remaining two pieces of dough in two batches to make a total of 36 dumplings.
- 30In a cast-iron frying pan, heat 3 tablespoons of the peanut oil over high heat.
- 31When a wisp of white smoke appears, turn off the heat and place 18 of the dumplings in the pan.
- 32Turn on the heat to medium and allow the dumplings to cook for 3 minutes.
- 33Pour 1/2 cup of the water into the pan and allow the dumplings to cook for 7 to 10 minutes, or until the water evaporates.
- 34Reduce the heat to low and allow the dumplings to cook for about 2 minutes, or until they are golden brown on the bottom and the skins are translucent on top.
- 35To ensure the dumplings cook evenly, move the pan back and forth on the burner to distribute the heat evenly and prevent sticking.
- 36Remove to a heated dish and serve. Because these dumplings are best eaten hot, serve in batches.
Save this recipe and plan your week
A free account lets you save recipes, plan your meals and build grocery lists.
Or get the app: App Store · Google Play