By Jules Copper
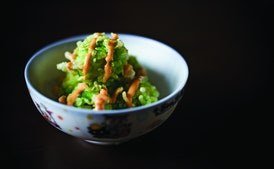
Crispy Tofu Balls are a delightful fusion of Vietnamese flavors, combining tender tofu with a crunchy coating and a savory rice mixture, all drizzled with a spicy aioli.
30 minPrep Time
N/AServings
Nutritional Information
-Calories
-Protein
-Carbs
-Fat
-Sugar
Na-Sodium
Ingredients
- 1 (19-ounce) package firm tofu
- ⅓ cup finely chopped scallions
- 5 ⅓ teaspoons mushroom bouillon
- 4 tablespoons fresh corn, off the cob
- 2 pinches ground white pepper
- Spicy aioli, for garnish and dip
- 1 cup all-purpose flour
- 1 ¼ cups water
- 2 ¼ teaspoons mushroom bouillon
- 1 (12-ounce) package green glutinous rice flakes (aka com dep xanh)
- ½ cup cornstarch
Instructions
- 1Pressing the tofu is the most important step, so I’m going to give y’all (I grew up in Texas, so I have the liberty to use “y’all” liberally) three pressing options.
- 2The first step before you press is the same: Drain the liquid from the box of tofu.
- 3Then press.
- 4Method 1: (Easiest) Use a tofu-pressing machine!
- 5I spotted one of these in Torrance, California, at a little Japanese grocery store.
- 6You place a block of tofu in between two plates and turn a small crank to compress it.
- 7Though it will press only one block at a time—the boxes of tofu we use come four to a box—you can set it and forget it (but do it three more times if you plan on using all the tofu).
- 8Method 2: (Most common) Use two similar-size plates or relatively flat surfaces.
- 9Lay out the blocks of tofu flat in a single layer on one of the plates, and then put the second plate on top of the tofu.
- 10Press the tofu by placing at least 10 pounds of weight on top of the second plate.
- 11Method 3: (Most “professional”) We still prepare the tofu this way at our restaurant, which is, without question, the most efficient way to prepare larger servings.
- 12Lay baking racks/grates inside baking sheets, then cover racks with clean (lint-free) towels or, as we did successfully for four years, with neatly folded aprons laid in a single layer as level and as flat as possible across the racks.
- 13Yup, towels or aprons, plural.
- 14Because tofu holds so much moisture, the liquid constantly spills over, and we’ve found very few people who just live to clean.
- 15To absorb the moisture, and to create much less of a mess, we started using layers of cloth.
- 16Lay out the tofu on the covered racks in a single layer, organized as tightly as possible.
- 17Make sure the tofu doesn’t hang over the sides of the sheets or it won’t be pressed evenly.
- 18Next, lay another towel/apron on top of the layer of tofu, again, flat and level.
- 19Then lay another equal-size baking sheet + covered rack + tofu on top of that.
- 20Repeat the same steps as needed.
- 21The top layer should be a baking sheet on which you place 30 to 40 pounds of “stuff” to press down on all the layers.
- 22No matter how many layers you stack, the tofu should flatten out only slightly, not be completely crushed.
- 23Processing the tofu is far simpler than pressing it, though like pressing, there are three different ways to do it.
- 24Start with a bowl or a large (22-quart) plastic container made by and known as a Cambro (if you have one of those lying around), and do one of the following:
- 25Method 1: Use a food mill, which is what we use. This is by far the easiest way to process tofu and get the most consistent texture (and it’s a great method for mashing anything).
- 26Method 2: Use a potato masher. Just mash away, but you’ll still need to use the third option to smash out any little lumps that the masher doesn’t, um, well, mash.
- 27Method 3: Mash everything with your hands. (This is the most common way.)
- 28Process the tofu until it is a consistent, almost pasty texture.
- 29If you go with No.
- 302 or No.
- 313, make sure to smash out all lumps from the tofu or else the seasoning won’t evenly distribute throughout the mix and, later, the balls.
- 32Add chopped scallions, mushroom bouillon, corn, and ground white pepper to the (hopefully) evenly processed tofu.
- 33Stick your hands in (maybe with gloves) and mix all the ingredients.
- 34Taste some of the mix from different areas of the bowl/container to make sure it’s evenly seasoned.
- 35It should taste savory, with little bits of scallion and corn in every bite.
- 36Now it’s ball-rolling time!
- 37Scoop out a tablespoon of the tofu mixture, hand-pack it tightly into the spoon, then level out the spoon with your finger.
- 38Assertively shake or scoop out the mix into your hand while mostly keeping it in one piece.
- 39Firmly clench the tofu by making a fist, packing it very tightly so it doesn’t fall apart.
- 40Continue by shaping into a ball, either with one hand or by lightly tossing the ball back and forth between both hands like you’re playing catch with yourself.
- 41Lightly roll the tofu between your hands, moving your hands in an alternating clockwise motion, like you would forming a meatball, only more gently to smooth out any cracks.
- 42Tofu is very docile; the more you do it, the better you’ll get the feel of it (like most things in life).
- 43Place tofu balls on a plate or (ideally) a baking sheet rack.
- 44Optional: Refrigerate the balls overnight, uncovered. This will firm them up.
- 45Add flour, water, and mushroom bouillon to a bowl. Mix together. It should not be lumpy; the consistency should be not too thin and consistently thick enough to adhere, but not so thick it doesn’t drip off your finger.
- 46Empty the green rice flakes into a separate bowl or catering pan, then mix in half of the dry cornstarch with flakes.
- 47Next, drop balls into flour paste.
- 48Shake off excess paste (we highly recommend using a kitchen “spider” strainer to do this), then roll balls around in the flakes until they’re fully coated.
- 49Gently clench the balls to pack one last bit of flakes onto the balls.
- 50If flakes start to drop off the balls, mix in more of the remaining cornstarch to dry flakes, then try again.
- 51Set balls on a rack.
- 52Optional: If you plan on making more and hate waste like we do, clean and dry your hands, then sift through all the flakes.
- 53Throw out any moist clumps of flakes.
- 54Store dry flakes in a closed container, then refrigerate until your next tofu ball–rolling party!
- 55Optional: Refrigerate the fully flaked balls uncovered (and preferably elevated on a rack) overnight.
- 56This will give the flakes more time to adhere and dry out, which is important in giving the balls more puff, crunch, and an overall prettier look after frying.
- 57Add at least 2 inches of oil to a pot, bring to 350°F over high heat, then fry the balls for about 3 to 4 minutes, or until the flakes puff up bright green and any exposed tofu turns a slight golden color.
- 58If the balls start turning brown, the oil’s too hot or you’re frying them for too long.
- 59If the balls look oily or wet after frying, either the temperature is too low or you’re frying too many balls at once, which lowers the temperature of the oil too quickly.
- 60Remove from oil, shake off excess, drip dry on a rack. Plate and top with spicy aioli and more aioli on the side to dip.
Save this recipe and plan your week
A free account lets you save recipes, plan your meals and build grocery lists.
Or get the app: App Store · Google Play