By Sally Savoy
Egg Dough, a traditional Italian pasta made from flour and eggs, creating a delicate and flavorful base for a variety of sauces.
45 minPrep Time
N/AServings
Nutritional Information
-Calories
-Protein
-Carbs
-Fat
-Sugar
Na-Sodium
Ingredients
- 1 pound (450 grams) sifted all-purpose flour (farina 00)
- 5 medium or large eggs, or 4 extra-large or jumbo
- Extra flour for dusting and adjusting
Instructions
- 1Sift the flour onto a large wooden board.
- 2Form the flour into a mound with the approximate profile of Mount Fuji.
- 3Form your hand into a loose fist, and, with the back of the fingers, gently ream out the center of the mound until you have something that resembles a low, broad volcano with a very deep crater.
- 4Italian cooks call this a fountain, fontana, for the pool of liquid in the center, but it's definitely a cone.
- 5Break all the eggs into the crater one by one.
- 6Pierce the yolks with a fork and begin gingerly to use the fork to incorporate them into the flour with a movement something like scrambling eggs.
- 7Incorporate the liquid from the center outward.
- 8The walls of the crater will keep the liquid from running out.
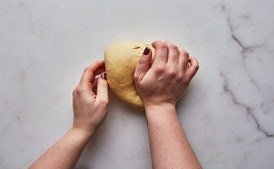
- 9When the liquid has absorbed enough flour that you now have a messy, wet dough surrounded by flour, knock what's left of the volcano in toward the center and begin to knead with your hands to incorporate the rest of the flour into the dough.
- 10Scrape up all the remaining flour and the dough bits and squeeze them into the dough.
- 11Put all the ingredients in the container of a food processor fitted with the steel blade (not pastry hooks or the like).
- 12Let rip at high speed until you see crumbs forming.
- 13Keep going until the dough forms a ball.
- 14You may become convinced that your dough will never form a single ball, only many little ones.
- 15In that case, give up because you risk overheating the dough.
- 16Pour what you have out on the wooden board; use your hands to form the pieces into a single loaf of dough.
- 17The biggest mistake people make, says Oretta, is not using enough force.
- 18Skip the gym the day you make pasta and make kneading your workout.
- 19The women of Scandriglia, where Oretta has her country house, recommend making fettuccine as a remedy for backache in preference to those boring exercises.
- 20On the other hand, my friend Antonietta, who learned to make pasta as a child in Basilicata, tells me southern men enjoy watching the undulating hips of southern women as they knead the pasta dough.
- 21If it helps to put on some music and do the maccheroni mambo as you knead, go right ahead.
- 22Plant your feet firmly on the floor and the heels of your hands firmly on the dough in front of you.
- 23A dining table will usually be a more comfortable height than a kitchen counter, which may be too high.
- 24With all your strength, and leaning in with your whole body, push the dough forward hard with the heel of one hand, then with the heel of the other hand.
- 25Then fold it over and continue the movement, alternating hands—or whatever works for you.
- 26You're pushing the whole piece of dough forward, so it moves on the board.
- 27After each completed movement, give the dough a quarter turn and repeat.
- 28Keep this up for 30 minutes, or as long as you can stand.
- 29If you've used the food processor, 15 or 20 minutes will do.
- 30You can quit early, too, if you plan to use a rolling machine: send the dough through one extra pass for each minute of kneading saved.
- 31As you work, the dough may seem dry, but you don't want it to be wet and sticky.
- 32It needs just enough moisture to hold it together, not a drop more.
- 33If your dough is so dry that you are quite sure it will never hold together, you can add a teensy bit of water. (It used to be quite normal to use water to save eggs, which could be sold for cash.) Your goal is a single smooth loaf of dough that is not sticky to the touch.
- 34If the flour is either very freshly ground (hence moister) or very old (drier), you'll have to adjust by feel.
- 35When it feels just right—moist but not tacky, considerably drier than the average dog's nose—set it aside for a moment.
- 36You'll probably need to clean the board about halfway through the process.
- 37Use a plastic scraper or the blunt side of a large knife to scrape up any bits that have stuck to the board. (Sharp knives may damage your nice wooden board, and their edges are dulled by scraping.) Likewise wash your hands, which are doubtless also encrusted with bits of dried dough by this time.
- 38Once you have a beautifully silky loaf of dough, let it rest for 30 minutes to let the gluten develop.
- 39Wrap it in foil, or just place it on the board and invert a bowl over it until you're ready.
- 40By this time, you probably need to put your feet up too.
- 41When the dough and you have rested, you can proceed to the next stage.
- 42Depending on what kind of pasta you want to make, this may involve rolling and cutting to make a pasta sheet (sfoglia) or pulling pieces directly from the loaf of dough and shaping them by hand.
Save this recipe and plan your week
A free account lets you save recipes, plan your meals and build grocery lists.
Or get the app: App Store · Google Play